COLLECTION IN C# .Net
Collections
Arrays
are simple data structures used to stored data items of a specific type.
Although commonly used, arrays have limited capabilities. For instance, you
must specify an array’s size, and if at execution time, you wish to modify it,
you must do so manually by creating a new array or by using Array class’s
Resize method, which creates a new array and copies the existing elements into
the new array.
Collections
are a set of prepackaged data structures that offer greater capabilities than
traditional arrays. They are reusable, reliable powerful and efficient and have
been carefully designed and tested to ensure quality and performance.
Collections are similar to arrays but provide additional functionalities, such as dynamic resizing – they automatically
increase their size at execution time to accommodate additional elements,
inserting of new elements, removing of existing elements etc.
Initially
.net introduces so many collection classes under the namespace
System.Collections like Stack, Queue, LinkedList, SortedList, ArrayList etc,
you can work out with these classes in your application where you need the
appropriate behaviour.
To
use these classes open a new project of type “Console Application” naming it as
“CollProject” now under the first class Program.cs write the following code to
use the Stack class which works on the principle First In Last Out (FILO) or
Last In First Out (LIFO):
using System.Collections;
class Program {
static void Main(string[] args) {
Stack s = new Stack(); s.Push(10);
s.Push("Hello"); s.Push(3.14f); s.Push(true); s.Push(67.8);
s.Push('A');
foreach (object obj in s) Console.Write(obj + " ");
Console.WriteLine();
Console.WriteLine(s.Pop());
foreach (object obj in s) Console.Write(obj + " ");
Console.WriteLine();
Console.WriteLine(s.Peek());
foreach (object obj in s) Console.Write(obj + " ");
Console.WriteLine();
Console.WriteLine(s.Count);
s.Clear(); Console.WriteLine(s.Count);
Console.ReadLine();
}
}
Using Queue class which works on the
principle First In First Out (FIFO):
using System.Collections;
class Class1 {
static void Main() {
Queue q = new Queue();
q.Enqueue(10);
q.Enqueue("Hello"); q.Enqueue(true); q.Enqueue(3.14f);
q.Enqueue('A');
foreach (object obj in q) Console.Write(obj + " "); Console.WriteLine();
Console.WriteLine(q.Dequeue());
foreach (object obj in q) Console.Write(obj + " "); Console.ReadLine();
}
}
Auto-Resizing of Collections:
The
capacity of a collection increases dynamically i.e. when we keep adding new
elements under the collection automatically the size keep on incrementing.
Every collection class has 3 constructors to it and the behavior of collections
will be as following when created object using different constructor:
i.
Default
Constructor: initializes a new instance of the collection class that is empty
and has the default initial capacity as zero which becomes 4 after adding the
first element and from them when ever needed the current capacity doubles.
ii.
Collection(int
capacity): Initializes a new instance of the collection class that is empty and
has the specified initial capacity, here also when requirement comes current
capacity doubles.
iii.
Collection(Collection):
Initializes a new instance of the collection class that contains elements
copied from the specified collection and that has the same initial capacity as
the number of elements copied, here also when requirement comes current
capacity doubles.
ArrayList: this collection class works same as an array but provides
dynamic resizing, adding and deleting of items.
using System.Collections;
class Class2 {
static void Main() {
ArrayList al = new ArrayList();
Console.WriteLine("Initial Capacity: " + al.Capacity);
al.Add(10);
Console.WriteLine("Capacity after adding 1st item: " + al.Capacity);
al.Add("Hello");
al.Add(true); al.Add(3.14f);
Console.WriteLine("Capacity after adding 4 items: " +
al.Capacity);
al.Add(‘A’);
Console.WriteLine("Capacity after adding 5th item: " +
al.Capacity);
for (int i = 0; i <
al.Count; i++) Console.Write(al[i] +
" "); Console.WriteLine();
al.Remove(true); //Removing
values from the middle of an ArrayList
al.Insert(2, false);
//Inserting values in the middle of an ArrayList
foreach (object obj in al) Console.Write(obj + " "); Console.WriteLine();
ArrayList coll = new
ArrayList(al); //Creating new ArrayList
passing the old as an parameter
Console.WriteLine("Initial
Capacity of new collection: " + coll.Capacity);
coll.Add(200);
Console.WriteLine("Current Capacity after adding a new item: " +
coll.Capacity);
foreach (object obj in coll) Console.Write(obj + " "); Console.ReadLine();
}
}
Hashtable: it is a collection with stores elements in it as “Key Value
Pairs” i.e. Array and ArrayList also has a key to access the values under them
which is the index that starts at 0 to number of elements – 1, where as in case
of Hashtable these keys can also be defined by us which can be of any data
type.
using System.Collections;
class Class3 {
static void Main() {
Hashtable ht = new Hashtable();
ht.Add("Eno", 1001); ht.Add("Ename", "Scott");
ht.Add("Job",
"Manager"); ht.Add("Salary", 5000);
ht.Add("Dname", "Sales"); ht.Add("Loc", “Delhi
");
Console.WriteLine(ht["Salary"]); //Accessing the values of Hashtable using key
foreach (object obj in ht.Keys)
Console.WriteLine(obj + ":
" + ht[obj]); Console.ReadLine();
}
}
Generic Collections: these are introduced in C# 2.0 which are extension to
collections we have been discussing above, in case of collections the elements
being added under them are of type object, so we can store any type of values
in them, where as in generic collections we can store specific type of values
which provides type safety, .Net has re-implemented all the existing collection
classes under the namespace System.Collections.Generic but the main difference
is while creating object of generic collection classes we need to explicitly
specify the type of values we want to store under them. Under this namespace we
have been provided with many classes as in System.Collections namespace as
following:
Stack<T>, Queue<T>,
LinkedList<T>, SortedList<T>, List<T>, Dictionary<Tkey,
Tvalue>
Note: <T> referes to the type of values we want to store under them. For
example:
Stack<int> si = new
Stack<int>() ; //Stores integer values only
Stack<float> sf = new
Stack<float>(); //Stores
float values only
Stack<string> ss = new
Stack<string>(); //Stores
string values only
The
type of values being stored in a generic collection can be of user-defined type
values also like a class type or structure type that is defined to represent an
entity as following:
Stack<Customer> sc = new
Stack<Customer>(); //Assume Customer is a
user-defined class type that represents an entity Customer, so we can store
objects of Customer type under the Stack where each object can internally
represent different attributes of Customer like Id, Name, Balance, City, State
etc.
List: this class is same as ArrayList we have discussed under collections
above.
class Class4 {
static void Main() {
List<int> li = new
List<int>(); li.Add(10); li.Add(20); li.Add(30); li.Add(30); li.Add(50);
li.Add(60);
foreach (int i in li) Console.Write(i
+ " "); Console.WriteLine();
li[3] = 40; //Manipulating List values
for (int i = 0; i < li.Count; i++) Console.Write(li[i] + " "); Console.ReadLine();
}
}
Dictionary: this class is same as Hashtable we have discussed under
collections but here while creating the object we need to specify the type for
keys as well as for values also, as following:
Dictionary<Tkey, Tvalue>
class Class5 {
static void Main() {
Dictionary<string,
object> di = new Dictionary<string, object>();
di.Add("Eno", 1001); di.Add("Ename",
"Scott"); di.Add("Job",
"Manager");
di.Add("Salary",
5000.5); di.Add("Dname",
"Sales"); di.Add(“Location”,
“Hyderabad”);
foreach (string key in di.Keys) Console.WriteLine(key + ": " +
di[key]); Console.WriteLine();
di.Remove(“Job”); //Removing an element from
Dictionary using the Key.
foreach (string key in di.Keys) Console.WriteLine(key + ": " +
di[key]); Console.ReadLine();
}
}
Collection Initializers: this is a new feature added in C#
3.0 which allows to initialize a collection directly at the time of declaration
like an array, as following: List<int> li = new List<int>() { 10,
20, 30, 40, 50 };
class Class6 {
static void Main() {
List<int> li =
new List<int>() { 23, 41, 16, 78, 93, 58, 36, 84, 5, 63, 46, 12, 28, 71,
67 };
List<int> coll
= new List<int>();
foreach (int i in li)
{ if (i > 40) coll.Add(i);
} //Retrieving values of list > 40
coll.Sort(); //Sorting
the new list values in ascending order
coll.Reverse(); //Reversing the new list
values so that arranges in descending order
foreach (int i in
coll) Console.Write(i +
" "); Console.ReadLine();
}
}
In the above program we are filtering the values of a List
that are greater than 40 and arranging them in descending order, to do this we
have written an substantial amount of code which is the traditional process of
performing filters on arrays and collections. In C# 3.0 .net has introduced a
new language known as “LINQ” much
like SQL which we use universally
with relational databases to perform queries. LINQ allows you to write query expressions (similar to SQL queries)
that can retrieve information from a wide variety of data sources like objects,
databases and xml.

LINQ to Objects: used to perform
Queries against the in-memory data like an array or collection.
LINQ to Databases (LINQ enabled
ADO.NET):
- LINQ to DataSet is used to perform queries against
ADO.NET data sets and data tables.
- LINQ to SQL is used to perform queries against
the relation database, only Microsoft SQL Server.
- LINQ to Entities is used to perform queries
against any relation database like SQL Server, Oracle, etc.
LINQ to XML (XLinq): used to perform queries against the XML
source.
Advantages of LINQ:
i.
LINQ offers an object-based, language-integrated way
to query over data no matter where that data came from. So through LINQ we can
query database, XML as well as collections.
ii.
Compile time syntax checking.
iii.
It allows you
to query collections, arrays, and classes etc. in the native language of your
application, like VB or C# in much the same way as you would query a database
using SQL.
LINQ to Objects: using this we can perform
queries against the in-memory data like an array or collection and filter or
sort the information under them. Syntax of the query we want to use on objects
will be as following:
from
<alias> in <array | collection> [<clauses>] select
<alias>
- Linq queries start with from keyword and ends
with select keyword.
- While writing conditions we need to use the
alias name we have specified, just like we use column names in case of
SQL.
- Clauses can be like where, groupby and orderby.
- To use LINQ in your application first we need
to import System.Linq namespace.
We can write the above program where we have
filtered the data of a List and arranged in sorting order as following using
LINQ:
class Class7 {
static void Main() {
List<int> li = new List<int>() { 23, 41, 16, 78, 93, 58, 36,
84, 5, 63, 46, 12, 28, 71, 67 };
var coll = from i in li where i > 40 select i; //Retrieves all elements greater than 40
foreach (int i in coll) Console.Write(i
+ " "); Console.WriteLine();
coll = from i in li where i > 40 orderby i select i; //Arranging them in ascending order
foreach (int i in coll) Console.Write(i
+ " "); Console.WriteLine();
coll = from i in li where i > 40 orderby i descending select i; //Arranging them in descending order
foreach (int i in coll) Console.Write(i
+ " "); Console.ReadLine();
}
}
Note: the values that are returned by a LINQ query can be
captured by using implicitly typed local variables, so in the above case “coll”
is an implictly declared collection that stores the values retrieved by the
query.
In traditional process of filtering data of an array
or collection we have repetition statements that filter arrays focusing on the
process of getting the results – iterating through the elements and checking
whether they satisfy the desired criteria. LINQ specifies, not the steps
necessary to get the results, but rather the conditions that selected elements
must satisfy. This is known as declarative
programming – as opposed to imperative
programming (which we’ve been doing so far) in which you specify the
actual steps to perform a task. Object oriented programming is a subset of
imperative. The queries we have used above specifies that the result should
consist of all the int’s in the List that are greater than 40, but it does not
specify how those results are obtained – the C# compiler generates all the
necessary code automatically, which is one of the great strengths of LINQ.
LINQ Providers: The syntax of LINQ is built into the
language, but LINQ queries may be used in many different contexts because of
libraries known as providers. A LINQ provider is a set of classes that
implement LINQ operations and enable programs to interact with data sources to
perform tasks such as projecting, sorting, grouping and filtering elements.
When we import the System.Linq namespace it contains the LINQ to Objects
provider, without importing it the compiler cannot locate a provider for the
LINQ queries and issues errors on LINQ queries.
class Class8 {
static void Main() {
string[] colors = { "Red", "Blue", "Green",
"White", "Black", "Yellow", "Pink",
"Orange" };
var coll = from s in colors select s; //Retrieves
all colors as it is
foreach (string str in coll) Console.Write(str
+ " "); Console.WriteLine();
coll = from s in colors where s.Length == 5 select s; //Colors with length of 5
characters
foreach (string str in coll) Console.Write(str
+ " "); Console.WriteLine();
coll = from s in colors where s.Substring(0, 1) == "B" select
s; //Colors starting with character ‘B’
foreach (string str in coll) Console.Write(str
+ " "); Console.WriteLine();
coll = from s in colors where s.EndsWith("e") select s; //Colors ending
with character ‘e’
foreach (string str in coll) Console.Write(str
+ " "); Console.WriteLine();
coll = from s in colors where s.Contains('e') select s; //Colors that contain
character ‘e’
foreach (string str in coll) Console.Write(str
+ " "); Console.WriteLine();
coll = from s in colors where s.IndexOf('e') == -1 select s; //Colors that doesnot contain char ‘e’
foreach (string str in coll) Console.Write(str
+ " "); Console.WriteLine();
}
}
LINQ to SQL
Probably
the biggest and most exciting addition to the .Net Framework 3.5 is the
addition of the .Net Language Integrated Query Framework (LINQ) into C# 3.0.
Basically, what LINQ provides is a lightweight façade over programmatic data
integration. This is such a big deal because data is King. Pretty much every
application deals with data in some manner, whether that data comes from
memory, databases, XML files, text files, or something else. Many developers
find it very difficult to move from the strongly typed object-oriented world of
C# to the data tier where objects are second-class citizens. The transition
from the one world to the next was a kludge at best and was full of error-prone
actions.
In
C#, programming with objects means a wonderful strongly typed ability to work
with code. You can navigate very easily through the namespaces; work with a
debugger in the Visual Studio IDE, and more. However, when you have to access
data, you will notice that things are dramatically different. You end up in a
world that is not strongly typed, where debugging is a pain or even
non-existent, and you end up spending most of the time sending strings to the database
as commands. As a developer, you also have to be aware of the underlying data
and how it is.
Microsoft has provided LINQ as a lightweight façade that
provides a strongly typed interface to the underlying data stores. LINQ
provides the means for developers to stay within the coding environment they
are used to and access the underlying data as objects that work with the IDE,
Intellisense, and even debugging. With LINQ, the queries that you create now
become first-class citizens within the .NET Framework alongside everything else
you are used to. When you work with queries for the data store you are working
with, you will quickly realize that they now work and behave as if they are
types in the system. This means that you can now use any .NET-compliant
language and query the underlying data stores as you never have before.
LINQ to SQL and Visual Studio:
LINQ to SQL in particular is a
means to have a strongly typed interface against a SQL Server database. You
will find the approach that LINQ to SQL provides is by far the easiest approach
to the querying SQL Server available at the moment. It is important to remember that LINQ to SQL is not
only about querying data, but you also are able to perform Insert/Update/Delete
statements that you need to perform which are known as CRUD operations
(Create/Read/Update/Delete). Visual Studio comes into strong play with LINQ to
SQL in that you will find an extensive user interface that allows you to design
the LINQ to SQL classes you will work with.
To
start using LINQ to SQL first open a new Windows Project naming it as
“LinqProject”, then open the Server Explorer and create a new table under our
database naming the table as “Customer” with the following columns and also
store some initial data in it:
Custid (Int) [PK] Cname
(Varchar) City (Varchar) Balance (Money)
Adding a LINQ to SQL Class:
To work with LINQ first you need
to convert relational types of DB into object oriented types under the language
and the process of this conversion is known as ORM (Object Relational Mapping)
to perform this we are provided with a tool under visual studio i.e. OR
Designer (Object Relational Designer) which does an outstanding job of making
it as easy as possible.
To
start this task, right-click on LinqProject in Solution Explorer and select
‘Add New Item’ from the provided menu. In the items of dialog box, you will
find LINQ to SQL Classes as an option. Because in this example we are using
CSDB database, name the file as “CSDB.dbml” (Database Markup Language). Click on
the Add button, and you will see that this operation creates a couple of files
for you under the project after adding the “CSDB.dbml” file. Open the solution
explorer and watch under the CSDB.dbml file we will find 2 components
(CSDB.dbml.layout and CSDB.designer.cs) and also adds the reference of
System.Data.Linq assembly.
Introducing
the O/R Designer:
Another big addition
to the IDE that appeared when you added the LINQ to SQL class to your project
was a visual representation of the .dbml file. The O/R Designer will appear as
a tab within the document window directly in the IDE. The O/R Designer is made
up of two parts. The first part is for data classes, which can be Database,
Tables, Views, etc. Dragging such items on this surface will give you a visual
representation of the object that can be worked with. The second part (on the
right) is for methods, which map to the stored procedures within the database.
Creating the Customer Object:
For this example, we want to
work with the Customer table from the CSDB database, which means that you are
going to create a Customer class that will use LINQ to SQL map to Customer
table. Accomplishing this task is simply a matter of opening up a view of the
tables contained within the database from the Server Explorer dialog within
Visual Studio and dragging and dropping the Customer table onto the design
surface of the O/R Designer in LHS which will prompt with a window asking for
storing of ‘Connection String’ under Config File, so select Yes in it which
will add the connection string into it and also a bunch of code is added to the
CSDB.designer.cs file on our behalf with a set of classes in it, and those
classes will give you a strongly typed access to the Customer table. When we
drag and drop the first table on OR Designer the following actions gets
performed internally:
- Defines a class representing the database from which we are
accessing the objects with the name as DataContext and it uses our .dbml
file name as a prefix, because our .dbml file name is CSDB the name of
DataContext will CSDBDataContext.
- Defines a class representing
the table we have dragged and dropped on the OR Designer where the name of
the class will be same as the table name, as we dropped the Customer table
on OR Designer Customer class gets defined.
- Defines properties under the class which is defined representing the
table, where each property is defined representing each column of the
table.
Note: Now from the second object we place on OR Designer only the 2nd
and 3rd steps gets repeated.
Let us have a look into the code
added in CSDB.designer.cs file where we will find the classes CSDBDataContent
and Customer. CSDBDataContext is an object of type DataContext; we can view
this as something that maps to a Connection type object binding with the DB.
This object works with the connection string and connects to the database for
any required operations when we create object of the class. DataContext class
also provides methods like CreateDatabase,
DeleteDatabase, GetTable, ExecuteCommand, ExecuteQuery, SubmitChanges
etc, using which we can perform action directly on the database.
Customer is the
class that represents your table Customer and this class provides required
properties mapping with the columns of table and also contains a set of methods
DeleteOnSubmit, InsertOnSubmit, GetModifiedMembers, SingleOrDefault etc. for
performing CRUD operations on table.
Now
place a DataGridView control on the first Form of project, change the name of
DataGridView as dgView and write the following code.
using System.Data.Linq;
Under Form Load:
CSDBDataContext dc = new CSDBDataContext();
Table<Customer> tab = dc.GetTable<Customer>();
dgView.DataSource = tab;
Note: In the above case, the DataContext object is used to connect with CSDB
database and then the GetTable() method is called to populate the table of type
Customer.

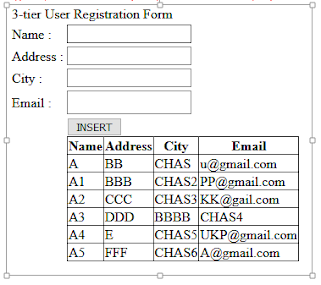
Now add a new form in project and design it as
following:
Declarations: CSDBDataContext dc;
List<Customer> cust; int rno = 0;
Under Form Load:
dc = new CSDBDataContext(); cust =
dc.GetTable<Customer>().ToList(); ShowData();
private void ShowData()
{
textBox1.Text =
cust[rno].Custid.ToString(); textBox2.Text = cust[rno].Cname;
textBox3.Text =
cust[rno].City; textBox4.Text = cust[rno].Balance.ToString();
}
Under Prev Button: if (rno > 0) {
rno -= 1; ShowData();
} else
MessageBox.Show("First record of the table",
"Information", MessageBoxButtons.OK,
MessageBoxIcon.Information);
Under Next Button: if (rno < cust.Count - 1) {
rno += 1; ShowData();
} else
MessageBox.Show("Last record of the table",
"Information", MessageBoxButtons.OK,
MessageBoxIcon.Information);
Performing CRUD operations using LINQ:
Create
2 new Forms as following, change the name of DataGridView of first form as
dgView and also set its readonly property as True. In second form change the
modifier of 4 TextBox’s, and Clear Button as Internal.

Declarations: CSDBDataContext dc;
private void LoadData() {
dc = new CSDBDataContext();
dgView.DataSource = dc.GetTable<Customer>();
}
Under Form Load: LoadData();
Under Insert Button: Form4 f = new Form4();
f.ShowDialog(); LoadData();
Under Update Button:
if (dgView.SelectedRows.Count > 0) {
Form4 f = new Form4();
f.textBox1.Text =
dgView.SelectedRows[0].Cells[0].Value.ToString(); f.textBox1.ReadOnly = true;
f.textBox2.Text =
dgView.SelectedRows[0].Cells[1].Value.ToString();
f.textBox3.Text =
dgView.SelectedRows[0].Cells[2].Value.ToString();
f.textBox4.Text =
dgView.SelectedRows[0].Cells[3].Value.ToString();
f.btnClear.Enabled = false;
f.ShowDialog(); LoadData();
}
else
MessageBox.Show("Select a
record for updating", "Warning", MessageBoxButtons.OK,
MessageBoxIcon.Warning);
Under Delete Button:
if (dgView.SelectedRows.Count > 0) {
if (MessageBox.Show("Do you
wish to delete the record?", "Confirmation",
MessageBoxButtons.YesNo,
MessageBoxIcon.Question) == DialogResult.Yes) {
int custid =
Convert.ToInt32(dgView.SelectedRows[0].Cells[0].Value);
Customer obj =
dc.Customers.SingleOrDefault(C => C.Custid == custid);
dc.Customers.DeleteOnSubmit(obj);
dc.SubmitChanges(); LoadData();
}
}
else
MessageBox.Show("Select a
record for deleting", "Warning", MessageBoxButtons.OK,
MessageBoxIcon.Warning);
Under Close Button: this.Close();
Code under Second
Form
Under Save Button:
CSDBDataContext dc = new CSDBDataContext();
if (textBox1.ReadOnly == false) {
Customer obj = new Customer();
obj.Custid =
int.Parse(textBox1.Text); obj.Cname = textBox2.Text;
obj.City = textBox3.Text;
obj.Balance = decimal.Parse(textBox4.Text);
dc.Customers.InsertOnSubmit(obj);
dc.SubmitChanges();
MessageBox.Show("Record
added to database table", "Information", MessageBoxButtons.OK,
MessageBoxIcon.Information);
}
else {
Customer obj =
dc.Customers.SingleOrDefault(C => C.Custid == int.Parse(textBox1.Text));
obj.Cname = textBox2.Text;
obj.City = textBox3.Text; obj.Balance = decimal.Parse(textBox4.Text);
dc.SubmitChanges(); ;
MessageBox.Show("Record
modified under database table", "Information",
MessageBoxButtons.OK,
MessageBoxIcon.Information);
}
Under Clear Button: textBox1.Text = textBox2.text = textBox3.Text = textBox4.Text = “”;
textBox1.Focus();
Under Close Button: this.Close();
To Perform CRUD operations on databases using Linq to Sql we
need to adopt the following process:
Steps for Inserting:
1. Create an object of
Customer entity (Class), which is defined representing the Customer entity
(Table) under database into which the record has to be inserted (because each
object is a record).
2. Referring to the properties
of object assign the values, as we are aware those properties represents
columns.
3. Call InsertOnSubmit
method on the table (Customers) which adds the record into the table in a
pending state.
4. Call SubmitChanges
method on DataContext object for committing the changes to DB server.
Steps for Updating:
1. Identify the record
that has to be updated by calling SingleOrDefault method on the table
(Customers).
2. Re-assign values to
properties so that old values gets changed to new values.
3. Call SubmitChanges
method on DataContext object for committing the changes to DB server.
Steps for Deleting:
1. Identify the record
that has to be deleted by calling SingleOrDefault method on the table
(Customers).
2. Call DeleteOnSubmit
method on the table (Customers) that deletes the record from table in a pending
state.
3. Call SubmitChanges method on DataContext object for committing the
changes to DB server.
Calling Stored Procedures thru LINQ:
If we
want to call any SP of Sql Server DB using LINQ we need to first drag and drop
the SP on RHS panel of OR-designer, so that it gets converted into a method
under DataContext class with same name of the SP. If the SP has any parameters
those parameters will be defined for the method also, where input parameters of
procedure becomes input parameters and output parameters of procedure becomes
ref parameters of the method. For example if the below SP was dropped on RHS
panel of OR-designer: Create Procedure Add(@x int, @y int, @z int
output)
The method gets
created as following:
public int Add(int? x, int? y, ref
int? z)
If the SP contains any non-query operations in it, in such
cases the return type of method will be int, where as if the SP has any select
statements in it that returns tables as result then the return type of the
method will be a ResultSet (Collection of Tables). We can watch the code under
Designer.cs file.
Calling Employee_Select Procedure: drag and drop Employee_Select SP on
the RHS panel of OR-Designer, take a new form place a ComboBox control on top
center and add values (All, Active and In-Active) into the ComboBox by using
its Items property, place a DataGridView control below the ComboBox, change the
name as dgView and write the below code:
Declarations: CSDBDataContext dc;
Under Form Load: dc = new CSDBDataContext(); comboBox1.SelectedIndex = 0;
Under ComboBox
SelectedIndexChanged:
if (comboBox1.Text == "All")
dataGridView1.DataSource = dc.Employee_Select(null, null);
else if (comboBox1.Text == "Active")
dataGridView1.DataSource = dc.Employee_Select(null, true);
else if (comboBox1.Text == "In-Active")
dataGridView1.DataSource = dc.Employee_Select(null, false);
Calling Employee_GetSalDetails Procedure: drag and drop Employee_GetSalDetails
SP on the OR-Designer, create a new form as following, set the ReadOnly
property of 2nd to 5th TextBox’s as True and write the
following code:

Code
under Execute Button:
CSDBDataContext dc = new CSDBDataContext(); decimal? sal =
null, pf = null, pt = null, nsal = null;
dc.Employee_GetSal(int.Parse(textBox1.Text), ref sal, ref pf,
ref pt, ref nsal);
textBox2.Text=sal.ToString();textBox3.Text=pf.ToString();textBox4.Text=pt.ToString();textBox5.Text=nsal.ToString()
Code under Close Button: this.Close();
Calling Employee_Insert Procedure:
Now
drag and drop Employee_Insert procedure on the OR-Designer which we have
created earlier. Add a new Form, design it as following, place an
OpenFileDialog control on the form and write the following code:

using System.IO; using
System.Data.Linq;
Declarations: CSDBDataContext dc; string imgPath;
Under Form Load: dc = new
CSDBDataContext();
Code under Insert
Button:
int? Empno = null; byte[] data =
File.ReadAllBytes(imgPath); Binary bin = new Binary(data);
dc.Employee_Insert(textBox2.Text,
textBox3.Text, decimal.Parse(textBox4.Text), bin, ref Empno);
textBox1.Text = Empno.ToString();
Code under Clear
Button:
textBox1.Text = textBox2.Text = textBox3.Text = textBox4.Text
= ""; pictureBox1.Image = null; textBox2.Focus();
Code under Close Button: this.Close();
Code under Load
Image Button:
openFileDialog1.Filter = "Jpeg Images
(*.jpg)|*.jpg|Bitmap Images (*.bmp)|*.bmp|All Files (*.*)|*.*";
DialogResult dr = openFileDialog1.ShowDialog();
if (dr == DialogResult.OK) {
imgPath =
openFileDialog1.FileName; pictureBox1.ImageLocation = imgPath;
}
Querying data from tables using LINQ to SQL: we can query and retrieve data from
table(s) using a query statement which should be used as following:
from <alias> in <table>
[<clauses>] select <alias> | new { <list of columns> }
Now
create Emp and Dept tables under CSDB database, drag and drop those tables on
LHS panel of OR-Designer, create a new form as following, change the
DataGridView name as dgView and write the following code:

Declarations: CSDBDataContext dc; bool flag;
Under Form Load: dc = new CSDBDataContext(); dgView.DataSource = from E in dc.Emps
select E;
comboBox1.DataSource = (from E in dc.Emps select new { E.Job
}).Distinct();
comboBox1.DisplayMember = "Job"; comboBox1.SelectedIndex = -1; flag
= true;
Under ComboBox SelectedIndexChanged:
if(flag) { dgView.DataSource = from E in dc.Emps where E.Job
== comboBox1.Text select E; }
Under ComboBox KeyPress Event:
if (Convert.ToInt32(e.KeyChar) == 13) {
if (comboBox1.Text !=
"All")
dgView.DataSource = from E in dc.Emps where
E.Job == comboBox1.Text select E;
else
dgView.DataSource = from E in dc.Emps select
E;
}
Under Button1: dgView.DataSource = from E in dc.Emps select new { E.Empno, E.Ename, E.Job,
Salary = E.Sal };
Under Button2: dgView.DataSource = from
E in dc.Emps orderby E.Sal select E;
Under Button3: dgView.DataSource = from E in dc.Emps orderby E.Sal descending select
E;
Under Button4: dgView.DataSource = from E in dc.Emps group E by E.Deptno into G select
new
{ Deptno = G.Key, EmpCount = G.Count()
};
Under Button5: dgView.DataSource = from E in dc.Emps group E by E.Job into G select
new
{ Job = G.Key, EmpCount = G.Count() };
Under Button6: dgView.DataSource =
from E in dc.Emps group E by E.Deptno into G where G.Count() > 5 select new
{ Deptno = G.Key, EmpCount = G.Count() };
Under Button7: dgView.DataSource =
from E in dc.Emps group E by E.Job into G where G.Count() < 5 select new
{ Job = G.Key, EmpCount = G.Count() };
Under Button8: dgView.DataSource = from E in dc.Emps where E.Job == "Clerk"
group E by E.Deptno into G where
G.Count() > 1 orderby G.Key
descending select new { Job = G.Key,
EmpCount = G.Count() };
Under Button9: dgView.DataSource = from E in dc.Emps group E by E.Deptno into G select
new
{ Deptno = G.Key, MaxSal = G.Max(E
=> E.Sal) };
Under Button10: dgView.DataSource = from E in dc.Emps group E by E.Job into G select
new
{ Job = G.Key, MinSal = G.Min(E =>
E.Sal) };
Under Button11: dgView.DataSource = from E in dc.Emps join D in dc.Depts on E.Deptno
equals D.Deptno select
new { E.Empno, E.Ename, E.Job, E.Mgr,
E.Sal, E.Comm, D.Deptno, D.DName, D.Loc };
Note: Linq doesn’t have having clause, where clause is only provided with the
behavior of where as well as having also. If we use where before group by it
works like where and if used after group by it works like having clause.
ADO.NET Entity Framework
ADO.NET
Entity Framework abstracts the relational (logical) schema of the data that is
stored in a database and presents its conceptual schema to the application.
This abstraction eliminates the object-relational impedance mismatch that is
otherwise common in conventional database-oriented programs. For example, in a
conventional database-oriented system, entries about a customer and their
information can be stored in a Customers table, their orders in an Orders table
and their contact information in yet another Contacts table. The application
that deals with this database must "know" which information is in
which table, i.e., the relational schema of the data is hard-coded into the application.
The
disadvantage of this approach is that if this schema is changed the application
is not shielded from the change. Also, the application has to perform SQL joins
to traverse the relationships of the data elements in order to find related
data. For example, to find the orders of a certain customer, the customer needs
to be selected from the Customers table, the Customers table needs to be joined
with the Orders table, and the joined tables need to be queried for the orders
that are linked to the customer. This model of traversing relationships between
items is very different from the model used in object-oriented programming
languages, where the relationships of an object's features are exposed as
Properties of the object and accessing the property traverses the relationship.
Also, using SQL queries expressed as strings, only to have it processed by the
database, keeps the programming language from making any guarantees about the
operation and from providing compile time type information. The mapping of
logical schema into the physical schema that defines how the data is structured
and stored on the disk is the job of the database system and client side data
access mechanisms are shielded from it as the database exposes the data in the
way specified by its logical schema.
Entity Data Model: the Entity data model (EDM)
specifies the conceptual model (CSDL) of the data via the Entity-Relationship
data model, which deals primarily with Entities and the Associations they
participate in. The EDM schema is expressed in the Schema Definition Language
(SDL), which is an application of XML. In addition, the mapping (MSL) of the
elements of the conceptual schema (CSDL) to the storage schema (SSDL) must also
be specified. The mapping specification is also expressed in XML. Visual Studio
also provides Entity Designer, for visual creation of the EDM and the mapping
specification. The output of the tool is the XML file (*.edmx) specifying the
schema and the mapping.
Developing an EDM Project configuring with Sql Server:
Open
a new project of type windows name it as SqlEDMProject, open the add new item
window, select “ADO.NET Entity Data Model”, name it as “Sample.edmx” and click
Add button, which opens a wizard for configuring with the data source and to perform
the ORM operation.

Select
“Generate from database” option and click on Next button, which displays a window
for configuring with the database as following:

In this window if our
database is already configured under Server Explorer, ComboBox will show that
connection details or else click on “New Connection” button beside the ComboBox
which opens a Window as following:

In this window default
data source will be Microsoft Sql Server or else click on Change button which
opens the following window:

Choose
Microsoft SQL Server database and click on “Ok” button, provide the connection
details in the Connection Properties window and click on “Ok” button, now select
“Yes, include the sensitive data in the connection string” RadioButton in
Entity Data Model Wizard and click on “Next” button which displays a new window
as following:

In
this window choose the tables Dept and Emp, and click on Finish button which
displays the list of tables we have selected, relations between the tables and
also on the RHS we will find a window “Model Browser”, in it we can find our
tables their columns and also the constraint that are used for establishing
relations between the tables etc. in object oriented view on the top
(CSDBModel) as well as in relational view at the bottom (CSDBModel.Store) as
following:

Here
under the tables we will be finding some additional properties known as
“Navigation Properties” apart from the properties that will be generated for
each column of the table. Navigation Properties are used for navigating from
one table to the other as these tables have relations between each other, using
those properties we can retrieve data from both these table without using any
joins.
Note: if working under Visual Studio 2012 under Sample.edmx item we will be
finding two additional files Sample.tt and Sample.Context.tt, first delete
these 2 files under Solution Explorer and now go to Sample.edmx in document
window, right click on it and select Properties and in the property window we
will find a property “Code Generation Strategy” which will be having the value
as “None” change it as “Default” and build the solution.
Once we build the solution internally all the required
classes representing the database with the name as CSDBEntities (same as
CSDBDataContext in Linq to Sql), selected tables as well as properties
representing all the columns of tables selected as well as methods which are
required to perform the database operations gets generated same as we have seen
in case of LINQ to SQL. You can check this by expanding the Sample.edmx file in
solution explorer and view the code under Sample.Designer.cs file.
Now place a DataGridView control on a
form and write the following code in its form load event:
CSDBEntities db = new CSDBEntities ();
dataGridView1.DataSource = db.Emps.Select("it.Empno, it.Ename,
it.Job, it.Sal, it.Deptno");
or
dataGridView1.DataSource = db.Emps.Select("it.Empno, it.Ename,
it.Job, it.Sal, it.Deptno" ).Where("it.Deptno=30");
or
dataGridView1.DataSource = db.Emps.Select("it.Empno, it.Ename,
it.Job, it.Sal, it.Deptno").OrderBy("it.Deptno");
or
dataGridView1.DataSource = db.Emps.Select("it.Empno, it.Ename, it.Sal,
it.Deptno").OrderBy("it.Deptno Desc");
Note: “it” is an alias name representing
the table and this is a standard alias name that should be used for any table
which cannot be changed. Select, Where and OrderBy are methods that pre-defined
to access the data from required tables.

In the
second Form change the modifier as Internal for all the 5 TextBox’s, Save and
Clear button also so that they can be accessed from first form and in the first
form change the DataGridView name as dgView.
Code under First Form
Declarations: CSDBEntities db;
Under Form Load: db = new CSDBEntities();
dgView.DataSource = db.Emps.Select("it.Empno, it.Ename, it.Job,
it.Sal, it.Deptno");
Under Insert Button: Form3 f = new Form3(); f.btnSave.Text = "Insert";
f.ShowDialog();
dgView.DataSource = db.Emps.Select("it.Empno, it.Ename, it.Job,
it.Sal, it.Deptno");
Under Update Button: if (dgView.SelectedRows.Count > 0) {
Form3 f = new Form3();
f.textBox1.Text =
dgView.SelectedRows[0].Cells[0].Value.ToString();
f.textBox2.Text =
dgView.SelectedRows[0].Cells[1].Value.ToString();
f.textBox3.Text =
dgView.SelectedRows[0].Cells[2].Value.ToString();
f.textBox4.Text =
dgView.SelectedRows[0].Cells[3].Value.ToString();
f.textBox5.Text =
dgView.SelectedRows[0].Cells[4].Value.ToString();
f.btnSave.Text =
"Update"; f.ShowDialog();
dgView.DataSource =
db.Emps.Select("it.Empno, it.Ename, it.Job, it.Sal, it.Deptno");
}
else
MessageBox.Show("Select a
record from GridView to update",
"Warning", MessageBoxButtons.OK,
MessageBoxIcon.Warning);
Under Delete Button: if (dgView.SelectedRows.Count > 0) {
if (MessageBox.Show("Do you
wish to delete the record?", "Confirmation",
MessageBoxButtons.YesNo,
MessageBoxIcon.Question)
== DialogResult.Yes) {
int empno =
Convert.ToInt32(dgView.SelectedRows[0].Cells[0].Value);
Emp obj = db.Emps.SingleOrDefault(E
=> E.Empno == empno); db.Emps.DeleteObject(obj);
db.SaveChanges();
dgView.DataSource=db.Emps.Select("it.Empno, it.Ename, it.Job, it.Sal,
it.Deptno");
}
}
else
MessageBox.Show("Select a
record from GridView to delete", "Warning", MessageBoxButtons.OK,
MessageBoxIcon.Warning);
Code under Second Form
Under Save Button:
CSDBEntities db = new CSDBEntities();
if (btnSave.Text == "Insert")
{
Emp obj = new Emp(); obj.Empno =
int.Parse(textBox1.Text); obj.Ename = textBox2.Text;
obj.Job = textBox3.Text; obj.Sal
= decimal.Parse(textBox4.Text); obj.Deptno = int.Parse(textBox5.Text);
db.Emps.AddObject(obj);
db.SaveChanges();
}
else {
int empno =
int.Parse(textBox1.Text); Emp obj = db.Emps.SingleOrDefault(E => E.Empno ==
empno);
obj.Ename = textBox2.Text;
obj.Job = textBox3.Text; obj.Sal = decimal.Parse(textBox4.Text);
obj.Deptno =
int.Parse(textBox5.Text); db.SaveChanges();
}
Calling Stored Procedures:
To call
Stored Procedures, go to Sample.edmx in
document window, right click on it and select the option “Update model from the
Database” which opens a window as following:

In
this window expand the Stored Procedure and Functions node and select the
procedures we want to consume in our application and click finish, now in the
Model Browser window all the stored procedures gets added in CSDBModel.Store
under the node Stored Procedures/functions as well as in CSDBModel under the
node Function Imports we can find all the Stored Procedures selected which got
converted into methods and we can find them with in the class CSDBEntities,
same as we seen in case of Linq to Sql.

To
call the Employee_Select procedure add a new Form under the project, place a
ComboBox control at “Top Center” of the form and add the values (All, Active
and In-Active) by using the items collection property, now place a DataGridView
control below the ComboBox setting its dock property as bottom and write the
following:
Declarations: CSDBEntities db;
Under Form Load:
db = new CSDBEntities(); comboBox1.SelectedIndex
= 0;
Under ComboBox
SelectedIndexChanged:
if(comboBox1.SelectedIndex == 0) { dataGridView1.DataSource =
db.Employee_Select(null, null); }
else if(comboBox1.SelectedIndex == 1) { dataGridView1.DataSource
= db.Employee_Select(null, true); }
else if (comboBox1.SelectedIndex ==
2) { dataGridView1.DataSource = db.Employee_Select(null, false); }
Retrieving data from Tables:
We can retrieve data from
table(s) using “Linq to Entities” query language which will be same as we have
used in case of “Linq to Sql” for querying the data. We can use all the queries
and clauses as it is here also the only difference is retrieving data from
multiple tables is simplified here i.e. by using the navigation properties we
have seen above we can access the data from multiple tables without using any
join statement. To test this add a new form under the project, place a
DataGridView Control on it and write the following code under its Form Load:
CSDBEntities db = new CSDBEntities();
dataGridView1.DataSource = from E in
db.Emps select new { E.Empno, E.Ename, E.Job, E.Mgr, E.HireDate, E.Sal, E.Comm,
E.Deptno, E.Dept.DName, E.Dept.Loc };
Developing an EDM Project configuring with Oracle:
Open
a new project of type windows; name it as “OracleEDMProject”. Open “Add New
Item” window under the project, select “ADO.NET Entity Data Model”, name it as
“Sample.edmx” and click on Add Button which opens a wizard for configuring with
the data source and to perform the ORM operation, select “Generate from
database” option in it and click Next Button, in the Next Window click on “New
Connection” Button, select Oracle Database in the window opened and click OK:

Provide the connection details for Oracle and then click on
Test Connection button to check the connection details and then click on OK button:

Once you click on Ok button it opens the following window, in
it select the radio button “Yes, include the sensitive data in the connection
string” and click on the Next Button:

Now it displays a window with the list of table and stored
procedures present under the database, select Emp and Dept tables in it and click
finish button which displays the list of tables we have selected, relations
between the tables, also on the RHS we will find a window “Model Browser” and
in it we can find our tables their columns and also the constraint that are
used for establishing relations between the tables etc.
Here under the tables we will be finding some additional
properties known as “Navigation Properties” apart from the properties that will
be generated for each column of the table. Navigation Properties are used for
navigating from one table to the other as these tables have relations between
each other, using those properties we can retrieve data from both these table
without using any joins.
Once the tables are selected and clicked on the finish button
internally all the required classes representing the database with the name as Entities, selected tables as well as
properties representing all the columns of tables selected as well as methods
which are required to perform the database operations gets generated same as we
have seen in case of LINQ to SQL.
You can check this by expanding the Sample.edmx file in solution explorer and
view the code under Sample.Designer.cs file.
Note: if working under Visual Studio 2012
under the Sample.edmx we will be finding two additional files Sample.tt and
Sample.Context.tt, first delete these 2 files under Solution Explorer and also
under the Model Properties we will find a property “Code Generation Strategy”
which will be having the value as “None” change it as “Default”.
Now Place a DataGridView control on a
form change the name of the control ad dgView and write the following code
under the form load event:
Entities db = new Entities (); //Creating object of Entities class for
establishing connection
dgView.DataSource = db.EMPs.Select("it.Empno, it.Ename, it.Job,
it.Sal, it.Deptno");
or
dgView.DataSource = db.EMPs.Select("it.Empno, it.Ename, it.Job,
it.Sal, it.Deptno").Where("it.Deptno=30");
or
dgView.DataSource =
db.EMPs.Select("it.Empno,
it.Ename, it.Job, it.Sal,
it.Deptno").Where("it.Deptno=30").OrderBy("it.Sal");
or
dgView.DataSource =
db.EMPs.Select("it.Empno,
it.Ename, it.Job, it.Sal,
it.Deptno").Where("it.Deptno=30").OrderBy("it.Sal
Desc");
Performing CRUD Operations: Create 2 new forms as following:

In
the second Form change the modifier as Internal for all the 5 TextBox’s, Save
and Clear button also so that they can be accessed from first form and in the
first form change the DataGridView name as dgView.
Code under First Form
Declarations: Entities db;
Under Form Load: db = new Entities();
dgView.DataSource = db.EMPs.Select("it.Empno, it.Ename, it.Job,
it.Sal, it.Deptno");
Under Insert Button: Form3 f = new Form3(); f.btnSave.Text = "Insert";
f.ShowDialog();
dgView.DataSource = db.EMPs.Select("it.Empno, it.Ename, it.Job,
it.Sal, it.Deptno");
Under Update Button: if (dgView.SelectedRows.Count > 0) {
Form3 f = new Form3();
f.textBox1.Text =
dgView.SelectedRows[0].Cells[0].Value.ToString(); f.textBox1.ReadOnly = true;
f.textBox2.Text =
dgView.SelectedRows[0].Cells[1].Value.ToString();
f.textBox3.Text =
dgView.SelectedRows[0].Cells[2].Value.ToString();
f.textBox4.Text =
dgView.SelectedRows[0].Cells[3].Value.ToString();
f.textBox5.Text =
dgView.SelectedRows[0].Cells[4].Value.ToString();
f.btnSave.Text =
"Update"; f.btnClear.Enabled = false; f.ShowDialog();
dgView.DataSource = db.EMPs.Select("it.Empno,
it.Ename, it.Job, it.Sal, it.Deptno");
}
else
MessageBox.Show("Select a record in GridView for update.",
"Warning", MessageBoxButtons.OK,
MessageBoxIcon.Warning);
Under Delete Button: if (dgView.SelectedRows.Count > 0) {
if (MessageBox.Show("Are you
sure of deleting the record?", "Confirmation",
MessageBoxButtons.YesNo,
MessageBoxIcon.Question)
== DialogResult.Yes) {
int Empno =
Convert.ToInt32(dgView.SelectedRows[0].Cells[0].Value);
EMP obj = db.EMPs.SingleOrDefault(E
=> E.EMPNO == Empno);
db.EMPs.DeleteObject(obj);
db.SaveChanges(); dgView.DataSource=db.EMPs.Select("it.Empno,
it.Ename, it.Job, it.Sal, it.Deptno");
}
}
else
MessageBox.Show("Select a
record in GridView for delete.", "Warning",
MessageBoxButtons.OK,
MessageBoxIcon.Warning);
Code under Second Form
Under Insert Button:
Entities db = new Entities();
if (btnSave.Text == "Insert")
{
EMP obj = new EMP(); obj.EMPNO =
int.Parse(textBox1.Text); obj.ENAME = textBox2.Text;
obj.JOB = textBox3.Text; obj.SAL
= double.Parse(textBox4.Text); obj.DEPTNO = int.Parse(textBox5.Text);
db.EMPs.AddObject(obj);
db.SaveChanges();
}
else {
int Empno =
int.Parse(textBox1.Text); EMP obj = db.EMPs.SingleOrDefault(E => E.EMPNO == Empno);
obj.ENAME = textBox2.Text; obj.JOB
= textBox3.Text; obj.SAL = double.Parse(textBox4.Text);
obj.DEPTNO = int.Parse(textBox5.Text);
db.SaveChanges();
}
Under Clear Button:
textBox1.Text = textBox2.Text = textBox3.Text = textBox4.Text = “”;
textBox1.Focus();
Calling Stored Procedures:
We
can call stored procedures also using EDM just like in “Linq to Sql”, to call
the Select_Emp stored procedure we have defined under the MyPackage earlier
while discussing of ADO.Net, first open Sample.edmx file right click on the
file and select “Update Model from Database”:

Now it
opens a “Update Wizard” which we have seen earlier while creating a Model, in that
expand the node Stored Procedures and select the SP “MYPACKAGE.SELECT_DEPT” and
“MYPACKAGE.SELECT_EMP and click Finish button:

Now under the Model
Browser below Model.Store we will find the 2 procedures we have selected. As we
have learnt in “Linq to Sql” that Stored Procedures gets converted into methods
here also the same thing happens, so in Model Browser under the node
Sample.edmx we will find the 2 procedures as Function Imports.

Here
our Stored Procedures SELECT_DEPT AND SELECT_EMP are returning the data from
the database in the form of a cursor as an Output parameter, so first we need
to convert them into a return type of our method. To do this open the Solution
Explorer right click on the Sample.edmx file and select the option “Open With”,
which opens the following window init select the option “XML (Text) Editor” and
click on the Ok button:

Now it opens the Sample.edmx file in a XML format, and in it we will
find a Tag “Schema” as following:
<Schema Namespace="Model.Store" Alias="Self" Provider="Devart.Data.Oracle" ProviderManifestToken="Oracle, 10.2.0.3" xmlns:store="http://schemas.microsoft.com/ado/2007/12/edm/EntityStoreSchemaGenerator" xmlns="http://schemas.microsoft.com/ado/2009/02/edm/ssdl">
Now under the Schema tag add the following
content in the last line which should look as following:
<Schema Namespace="Model.Store" Alias="Self" Provider="Devart.Data.Oracle" ProviderManifestToken="Oracle, 10.2.0.3" xmlns:store="http://schemas.microsoft.com/ado/2007/12/edm/EntityStoreSchemaGenerator" xmlns="http://schemas.microsoft.com/ado/2009/02/edm/ssdl" xmlns:devart="http://devart.com/schemas/edml/StorageSchemaExtensions/1.0">
Actually
we are adding a new XML Namespace in the above case. Now go down the file and
there we will find a tag Function as
following:
<Function Name="MYPACKAGE_SELECT_DEPT" Aggregate="false" BuiltIn="false" NiladicFunction="false" IsComposable="false" ParameterTypeSemantics="AllowImplicitConversion"
StoreFunctionName="MYPACKAGE.SELECT_DEPT" Schema="SCOTT">
<Parameter Name="DCUR" Type="REF CURSOR" Mode="Out" />
</Function>
<Function Name="MYPACKAGE_SELECT_EMP" Aggregate="false" BuiltIn="false" NiladicFunction="false" IsComposable="false" ParameterTypeSemantics="AllowImplicitConversion"
StoreFunctionName="MYPACKAGE.SELECT_EMP" Schema="SCOTT">
<Parameter Name="ECUR" Type="REF CURSOR" Mode="Out" />
</Function>
Under
the Function Tag we will find a sub tag Parameter
which is our Output parameter DCUR and ECUR what we defined as Cursor which should be changed as a
return type of the methods, so do the following to change it and after
modification it should look as below:
<Function Name="MYPACKAGE_SELECT_DEPT" Aggregate="false" BuiltIn="false" NiladicFunction="false" IsComposable="false" ParameterTypeSemantics="AllowImplicitConversion"
StoreFunctionName="MYPACKAGE.SELECT_DEPT" Schema="SCOTT" devart:ResultSetParameterName="DCUR">
<!-- <Parameter Name="DCUR"
Type="REF CURSOR" Mode="Out" /> -->
</Function>
<Function Name="MYPACKAGE_SELECT_EMP" Aggregate="false" BuiltIn="false" NiladicFunction="false" IsComposable="false" ParameterTypeSemantics="AllowImplicitConversion"
StoreFunctionName="MYPACKAGE.SELECT_EMP" Schema="SCOTT" devart:ResultSetParameterName="ECUR">
<!-- <Parameter
Name="ECUR" Type="REF CURSOR" Mode="Out" /> -->
</Function>
Now
save and close the Sample.edmx, re-open it form solution explorer again, go to
Model Brower and under Model.Store, expland Stored Procedures / Functions node,
right click on the stored procedure “MYPACKAGE.SELECT_DEPT” and select the
option “Add Function Import” which opens a window as following:

Now under
the window opened change the Function Import Name as Select_DEPT, change the
Returns a collection of as “Entities”, and choose the Entity “DEPT”. After
making the changes it should look as following.

Click
on Ok button to close the window and do the same for “MYPACKAGE.SELECT_EMP”
stored procedure also by specifying the Function Import Name as “Select_EMP”
and Entity as “EMP”, which will add 2 new functions under the Function Imports
node as following:

Invoking the above Functions:
Add a new Windows Form
in the project, place a SplitContainer on it, change the Orientation property
as horizontal, place a DataGridView on each panel by setting their Dock
property as Fill and write the following code:
Under Form Load:
Entities db = new Entities();
dataGridView1.DataSource = db.SELECT_DEPT(); dataGridView2.DataSource
= db.SELECT_EMP();
Retrieving data from tables:
Take a new form and
design it as following, change the DataGridView name as dgView and write the
code:

Declarations: Entities db;
Under Form Load:db = new Entities(); comboBox1.DataSource =
db.EMPs.Select("it.Job").Distinct();
comboBox1.DisplayMember = "Job";
dgView.DataSource = from E in db.EMPs
select new { E.EMPNO, E.ENAME, E.JOB, E.SAL, E.COMM, E.DEPTNO };
Under ComboBox
SelectedIndexChanged:
dgView.DataSource = from E in db.EMPs
where E.JOB == comboBox1.Text select new { E.EMPNO, E.ENAME, E.JOB, E.SAL, E.COMM, E.DEPTNO };
Under Emp Count
Group By Deptno Button:
dgView.DataSource = from E in db.EMPs group E by E.DEPTNO
into G orderby G.Key select new { Deptno = G.Key, EmpCount = G.Count() };
Under Emp Count Group By Deptno with
Having Clause Button:
dgView.DataSource = from E in db.EMPs group E by E.DEPTNO into G where
G.Count() > 3 orderby G.Key select new { Deptno = G.Key, EmpCount =
G.Count() };
Under Emp Count
Group By Job Button:
dgView.DataSource = from E in db.EMPs
group E by E.JOB into G orderby G.Key select new { Job = G.Key, JobCount =
G.Count() };
Under Max Sal Group
By Deptno Button:
dgView.DataSource = from E in db.EMPs
group E by E.DEPTNO into G orderby G.Key select new { Deptno = G.Key, MaxSal =
G.Max(i => i.SAL) };
Under Min Sal Group
By Job Button:
dgView.DataSource = from E in db.EMPs
group E by E.JOB into G orderby G.Key select new { Job = G.Key, MinSal =
G.Min(i => i.SAL) };
Under Data from
Multiple Tables Button:
dgView.DataSource = from E in db.EMPs
select new { E.EMPNO, E.ENAME, E.JOB, E.MGR, E.HIREDATE, E.SAL, E.COMM,
E.DEPT.DEPTNO, E.DEPT.DNAME, E.DEPT.LOC };
Under Get Selected
Columns Button:
dgView.DataSource = from E in db.EMPs
select new { E.EMPNO, E.ENAME, E.JOB, E.SAL, E.DEPTNO };
LINQ Vs EDM:
- LINQ to SQL was developed for
rapid application development (RAD), whereas Entity Framework was
developed for enterprise application development.
- LINQ to SQL works with the
objects in a database whereas Entity Framework works with the conceptual
model of a database. As explained earlier, these are two different things
which further mean that the Entity Framework allows you to perform queries
against relationships between entities, mapping single entities to multiple
tables, and so on.
End Of Collection
____________________________________________________________________________________________________________________________________________________________________________________________________________


ReplyDeleteGreat post. Thanks for sharing a valuable information.....
Angularjs Training in Bangalore
Angularjs classes in pune
Angularjs Training in hyderabad
Angularjs Training in Gurgaon
Angularjs Training in delhi